
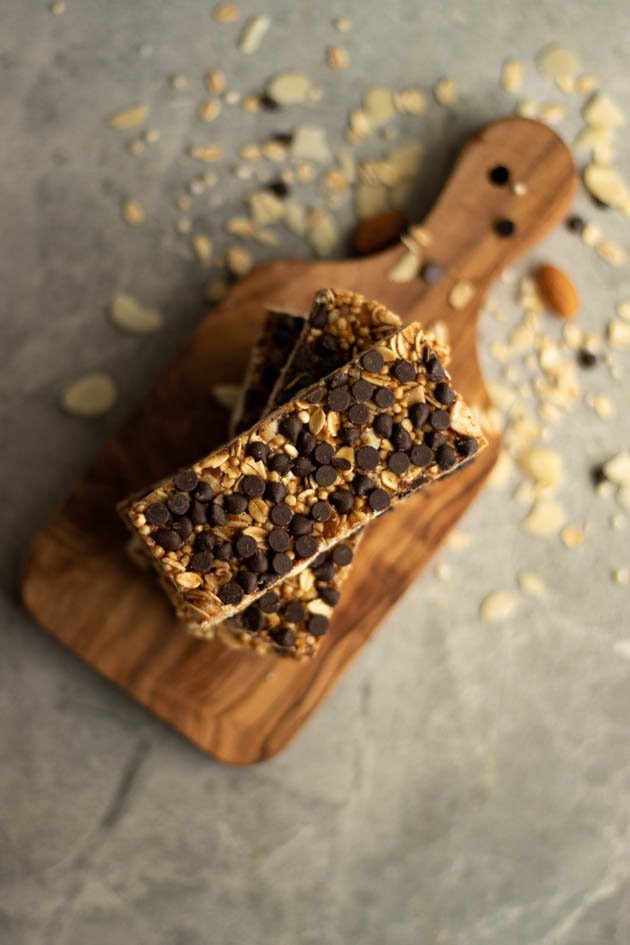
Puffed Quinoa Granola Bars
A Healthy, No-bake, Granola Bar? Sign me up!!
Snacks are the life-force of Small Humans. They are also the bane of every parent’s existence. The struggle of the constant snack-request loop is real. So. Very. Real. Especially so during these past 15 months of Pandemic Living. Enter these healthy Puffed Quinoa Granola Bars. They are made with wholesome ingredients and are designed to keep the Small Humans in your life away from the cusp of “hangry”. You’re welcome:). We’ve all seen a Hangry Small Human, and it ain’t pretty. As an added bonus – these are a hit with all three of my kiddos…and let me tell you – having all three of them enjoy the same snack is a rarity.

What goes into the perfect Puffed Quinoa Granola Bar?
These Puffed Quinoa Granola Bars are the perfect energizing and healthy snack! Chock-full of healthy, wholesome ingredients, such as:
Whole-grain Oats – a great source of fibre, manganese, Vitamin B1 and iron.
Almonds – loaded with anti-oxidants and protein, and high in Vitamin E and magnesium.
Maple extract – a highly underrated flavour powerhouse.
Avocado oil – rich in antioxidants and healthy fats.
Puffed quinoa – high in protein and fibre.

What is Puffed Quinoa?
Puffed quinoa is, well, quinoa grains that have been heated at a very high temperature in a pressure oven until they “puff”. Think puffed rice cereal, but healthier. Puffed quinoa is high in protein and fibre, and it is also a good source of potassium. While some super-humans make their own puffed quinoa, I find it easier to just buy the stuff at my local bulk food store. Easy, peasy.
How to Make these Healthy Puffed Quinoa Granola Bars
These Puffed Quinoa Granola Bars come together without needing to turn your ovens on. Now, that’s my kind of snack!!
Combine dry ingredients in a large bowl.
Combine wet ingredients in a small saucepan and heat over low heat until bubbling.
Add wet ingredients to dry ingredients and mix until fully coated.
Transfer to an 8 by 8-inch pan lined with aluminium foil, and press down firmly to set.
Place in freezer for 15 minutes.
Cut into 10 bars and bingo, bango, bongo – a healthy snack at your fingertips!!

How to Store
Store these Puffed Quinoa Granola Bars in an air-tight container in the fridge for several weeks or in the freezer for several months. Although I really doubt they’ll last that long!!
Other Healthy Snacks to Try!! Keep those Small Humans Hangry-free!

Puffed Quinoa Granola Bars
Ingredients
- 1 1/2 cups large flaked oats
- 1/3 cup raw whole almonds
- 1/4 cup slivered almonds
- 1 cup puffed quinoa
- 1/4 teaspoon fine sea salt
- 1/2 cup brown rice syrup
- 1/4 cup natural almond butter
- 2 teaspoons avocado oil
- 1 teaspoon maple exact
- 1/4 cup mini-chocolate chips
Instructions
- Line an 8-inch square baking pan with an aluminium foil sling (two pieces of foil that are placed perpendicular to one another).
- In a large bowl, combine oats, whole almonds, slivered almonds, quinoa and salt.
- In a small saucepan, combine brown rice syrup, almond butter, and avocado oil. Cook over low heat until mixture begins to boil. Remove from heat and add maple extract.
- Transfer almond butter mixture to bowl with oat mixture, and mix with rubber spatula until dry ingredients are coated in wet ingredients. Set aside to cool slightly before folding in chocolate chips. Alternatively, press chocolate chips into top of bars once in pan.
- Transfer mixture to prepared pan and spread in an even layer. Using the bottom of a straight-edge measuring cup (or the removable bottom of a tart pan, which is my go-to), press down firmly on the mixture. The more compact you make the mixture at this stage, the more sturdy the final bars will be.
- Place the baking pan in the freezer for 15 minutes. Using the sling, remove the square of bars out of the pan and place onto a cutting board. Use the tip of a knife to make notches at 4cm-intervals along the top of the square pf bars. Use these notches as a guide to cut the square into 5 strips, then slice each strip in half to make 10 bars.
- Store bars in an air-tight container in the fridge for several weeks or in the freezer for several month.