
Perfectly Perfect Brown Butter Chocolate Chunk Cookies

The “Perfect” Cookie
The “perfect” chocolate chip cookie is totally subjective. I get that. But, if you like your cookies to be chewy-in-the-centre, crisp-around-the-edges, with a caramel-nuttiness and a perfect balance of sweet and salty, then these cookies are for you! As an added bonus, these little gems come together without any fancy equipment – all you need is a little arm-power (think of it as a mini work-out before you indulge your sweet tooth!) and a cookie appetite. Let’s do this thing!
Over the years, I have tried many chocolate chip cookie recipes, and I do mean many, many, many recipes. Some have been good, some have even been close to great, but none has delivered on all fronts. If you’re going to go for an indulgent treat, my theory is that it had better be the best darn treat you’ve ever tasted. Make it count when you indulge!! And that’s why I came up with this recipe – chewy on the inside, crunchy around the edges, with deep notes of caramel from the brown butter. Everything I’m looking for in the perfect chocolate chip cookie.

What Are You Putting In Your Cookies?
So, what makes up the “perfect” chocolate chip cookie? Well, ingredients and ratios do matter when it comes to baking, and I’ve got you covered.
Flour:
The first thing that makes up a perfectly perfect chewy chocolate chip cookie is the type of flour you use. For the perfect chew, I use a mix of all-purpose and bread flour. Bread flour has a higher protein content than other flours, which lends to a chewier texture – just what we’re looking for, right? Right.
Eggs:
The next ingredient to consider is eggs. I use two whole eggs and an extra yolk to yield an extra chewy, tender and brownie-like texture. Easy peasy.
Sugar:
On to sugar…the type of sugar used in a cookie recipe can significantly impact the end result. Sounds a little intense, but it’s true. Granulated sugar makes for a thin and crisp cookie, while brown sugar lends itself to cakier, taller cookies that don’t spread as much. After many tests, I found that an even mix of both granulated sugar and dark brown sugar makes for the best end result – balance at its finest! Be sure to use dark brown and not light brown sugar for an even more robust caramel flavour.
Chocolate:
Every chocolate chip cookie needs chocolate, yes? But I’d be remiss to call these chocolate CHIP cookies, since the perfect chocolate chip cookie needs chunks, not chips. Roughly chopping your chocolate means that you’ll get different shapes and sizes of chocolate randomly dispersed throughout your cookie – basically, a party in your mouth! I like to use a mix of dark and milk chocolate to keep everyone happy. Feel free to use any type of chocolate, as long as it’s chopped by hand.

Brown Butter:
And now for the most important element of the “perfect” chocolate chunk cookie – the Brown Butter. This ingredient adds a depth of flavour to your cookies that will knock your socks off. If you’ve never tried brown butter, you’re really missing out. I don’t say that in a flippant way. I mean it. As in, your life is not complete until you’ve had brown butter. Although browning the butter does add an extra step, I promise it will be worth the extra 5 minutes. If we don’t have that kind of extra time on our hands, what do we have?
Brown butter (or beurre noisette if you want to get fancy) is just butter cooked in a skillet until the milk solids have browned, giving it a toasty and nutty flavour. To brown your butter for this recipe, place 3/4 cup (170 grams) of butter (cut into 1-inch cubes) in a medium saucepan over medium heat. Cook until the butter has melted, gently swirling the pan occasionally (about a minute or so).
Once the butter has melted, begin to stir the mixture constantly with a wooden spoon or rubber spatula. The butter will begin to sizzle, then foam (turn the heat down to medium-low if the sputtering is getting a little out of hand). Continue stirring constantly until the foaming subsides slightly and the butter turns to a golden brown. You’ll know you’re done browning your butter when the milk solids (the sandy bits at the bottom of the pan) become toasty and golden, and the butter smells nutty and caramel-y.
The whole process will take about 5 minutes. Brown butter is about 10 seconds away from burnt butter, so keep your eye on the pan and keep stirring those milk solids around so they toast evenly. Once the brown specks at the bottom of the pan are a deep golden colour, immediately remove the pan from the heat and transfer the mixture (including all the toasty brown bits!) to a heat-proof bowl to stop the cooking process.
At this point, you will have cooked off most of the liquid from the butter during the browning process. This moisture is needed to create the chewy texture we’re all looking for in the perfect chocolate chip cookie. Not a problem! All you’ll have to do is incorporate some water content back into the dough by adding 1/4 cup (57 grams) of soft butter (cut into small cubes) to the brown butter once it’s off the heat and stirring until melted. Best of both worlds – deliciously nutty and caramel-y flavour with the moisture level needed for the perfect chew!
Get Your Cookie Dough On!
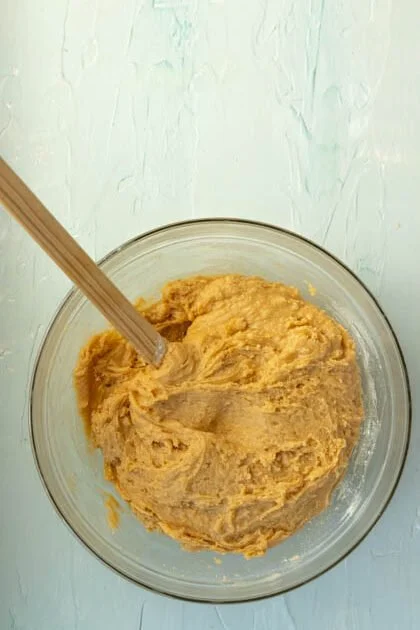
Once you’ve browned the butter, add the sugars, vanilla and salt to the butter mixture and whisk until fully incorporated.

Then add the eggs and yolk and whisk until smooth. Really get your back into this one…we don’t need a stand mixer for this recipe but we do need some muscle to fully incorporate the sugars into the dough. This next step incorporates a technique used by America’s Test Kitchen – the iconic authority on all things baking. In order to allow the sugars time to dissolve and deepen the flavour of the dough, the mixture is whisked for 30 seconds, then allowed to rest for 3 minutes. This is repeated two additional times, yielding a dough that is smooth, shiny and fully incorporated.

Next, sift the flour mixture over the brown butter mixture and GENTLY fold until just combined. Don’t over mix at this stage. We have gone to great lengths to get the perfect texture for these perfect cookies so don’t go ruining them by over-working the dough!

Next GENTLY fold in your roughly chopped chocolate. No chips here, right?
Now, here’s where I might lose you. But stay with me, I promise this next step will be worth it. After the cookie dough is complete, it needs to be chilled in order to maximize flavour and texture. This chilling process needs to happen for a minimum of 3 hours, but it’s best if you leave the dough in the fridge overnight. I know, this sounds a little extreme. And truth be told, I have been known to bake off a cookie or two before the end of the minimum chilling time. But, if you can exert some will-power and hold off for the greater good, I promise the results will be worth it. Chilling your cookie dough not only accentuates and deepens the caramel-y and nutty flavour, but it also ensures a thick and chewy texture. The whole point of this recipe!
Getting the Perfect Shape for Our Perfect Cookies
And finally, two tricks to follow to get the perfect shape for our perfect chocolate chunk cookies. For a perfectly perfect craggy top, I use a neat trick I learned from America’s Test Kitchen years ago. Once you have portioned out your dough and placed the dough mounds onto your prepared cookie sheet, tear each ball in half revealing a rough surface, then rotate each half so that the jagged surface faces upward. Then stick the balls back together again to form one ball with a top surface that remains jagged.
For a perfectly perfect round shape, I use another trick at the post-bake stage. Once your cookies are baked, immediately place a cookie cutter (one that is about 1/2 inch bigger than your cookie) over your cookie and make a circular motion so that the edge of the cookie comes into contact with the cookie cutter. Voila! Perfectly perfect round cookies.


LET’S GET BAKING because these Brown Butter Chocolate Chunk Cookies are:
CHEWY!
CRUNCHY!
CRISPY!
NUTTY!
CARAMEL-Y!
CHOCOLATY!
ALL KINDS OF PERFECT!

Perfectly Perfect Brown Butter Chocolate Chunk Cookies
Ingredients
- 1 1/2 cup (190 grams) all-purpose flour
- 3/4 cup (95 grams) bread flour
- 3/4 teaspoon baking soda
- 1 cup (227 grams) unsalted butter, divided as follows: 3/4 cup (170 grams), cut into 1-inch cubes and 1/4 cup (57 grams), cut into 1/4-inch cubes
- 3/4 cup less 1 tablespoon (140 grams) granulated sugar
- 3/4 cup less 1 tablespoon (140 grams) dark brown sugar
- 2 teaspoons vanilla
- 1 teaspoon fine sea salt (or 2 teaspoons coarse sea salt)
- 2 large eggs plus one egg yolk, room temperature
- 1 1/4 cup (220 grams) chocolate of your choice, roughly chopped
- Coarse sea salt for sprinkling
Instructions
- Sift together flours and baking soda.
- Brown your butter by placing 3/4 cup (170 grams) of butter (cut into 1-inch cubes) in a medium sauce pan over medium heat. Cook until butter has melted, gently swirling pan occasionally (approximately 1 minute). Once butter has melted, begin to stir mixture constantly with a wooden spoon or rubber spatula. The butter will begin to sizzle and pop, then foam. Continue stirring constantly until foaming subsides slightly and butter turns a golden brown. Continue to cook until the milk solids become toasty and golden, and the butter smells nutty and caramel-y (approximately 5 minutes from start to finish). Make sure to keep an eye on the pot the whole time so your brown butter doesn’t turn into burnt butter.
- Immediately remove pan from heat and transfer mixture to a heat-proof bowl. Add 1/4 cup (55 grams) butter (cut into 1/4-inch cubes) to the brown butter and stir until melted.
- Once butter has melted, add sugars, vanilla and salt and whisk until fully incorporated.
- Next, add eggs and yolk, and whisk vigorously for 30 seconds until smooth. Really get your back into this one - we need some muscle to fully incorporate the sugars into the dough.
- Let the dough rest for 3 minutes. Repeat this process 2 additional times until dough is smooth, shiny and fully incorporated.
- Sift flour mixture over the butter-sugar mixture and gently fold with rubber spatula to incorporate. Don’t overmix.
- Gently fold in chocolate chunks.
- Place cookie dough in refrigerator for a minimum of 3 hours (overnight is best for deeper, most awesome flavour). Remove from fridge and set cookie dough on counter until dough is pliable (and approximately 65°F).
- When ready to bake, preheat oven to 350°F with rack in middle position and line a rimmed baking sheet with parchment paper. These cookies are best when baked one sheet at a time. Patience is a virtue - I promise it will be worth it.
- Divide dough into 3 tablespoon portions (using 1.5 ounce cookie scoop).
- Tear each ball in half revealing a rough surface, then rotate each half so that the jagged surface faces upward. Then stick the ball back together again to form one ball with a top surface that remains jagged.
- Place cookies onto prepared baking sheet, 3-inches apart. You should be able to fit 6 to 8 cookies on the baking sheet.
- Bake until edges of the cookies are set and golden brown, and centre of the cookies are puffed but not wet-looking, about 10 to 15 minutes, rotating pan halfway through baking.
- While cookies are still hot, sprinkle with coarse sea salt and shape into perfect circles using tip set out above.
- Let cool on baking sheet for 5 minutes then transfer to cooling rack and cool completely.
- Repeat cooking process with remaining cookie dough.
Notes
- Cookies can be stored at room temperature for 3 days.
- Once cookie dough has been formed into balls, freeze on a baking sheet until solid. Then place cookie dough in an air-tight container and freeze up to 1 month. Allow dough to return to room temperature and bake as directed.